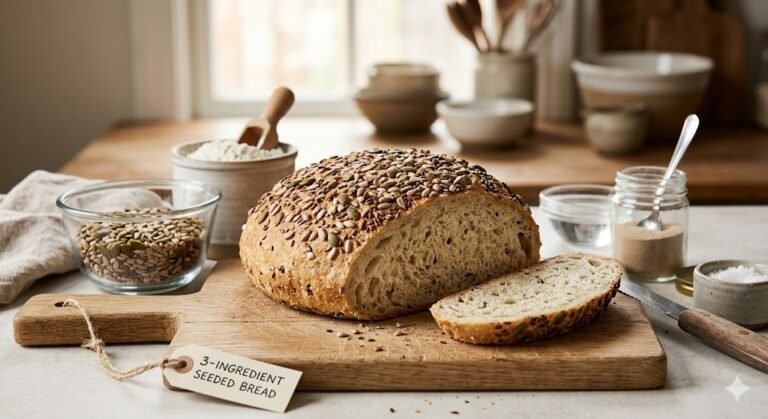
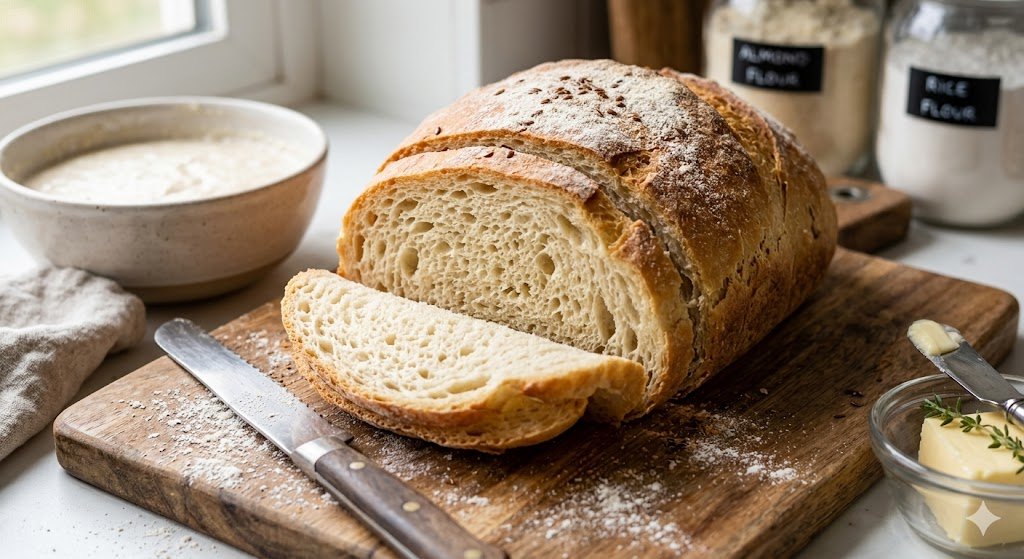
fluffy and soft gluten free bread recipe
Fluffy and Soft Gluten Free Bread Recipe: Your Complete Guide to Bakery-Quality Slices at Home
Why Your Previous Attempts Fell Short (And What Changes Everything)
You’ve been there. Standing in your kitchen, staring at a loaf that resembles a brick more than bread. The crumbs scatter across your cutting board like sand. Your knife struggles through the dense center. Another recipe promising a fluffy and soft gluten free bread recipe has let you down.
Here’s what nobody tells you: gluten-free baking operates on entirely different rules. Wheat bread relies on gluten—that stretchy protein web trapping air bubbles and creating that familiar chew. Remove gluten, and you’re essentially building architecture without scaffolding. Most home bakers approach gluten-free recipes the same way they handle traditional dough. That’s where everything unravels.
The texture you crave isn’t impossible. It simply demands a shift in thinking. Instead of one flour doing heavy lifting, you need an ensemble cast. Each ingredient plays a specific role. Brown rice flour brings structure. Tapioca starch adds that satisfying pull when you tear a slice. Potato starch locks in moisture so your loaf stays tender for days. Psyllium husk—an ingredient most wheat bakers never touch—creates a gel network mimicking gluten’s elasticity.
Research from food scientists at the University of Milan confirms what experienced gluten-free bakers already suspect: bread combining xanthan gum with psyllium husk achieves structural integrity remarkably close to wheat-based alternatives. The study, published in a leading food science journal, measured elasticity coefficients and found the combination produces 85% of the stretch found in conventional loaves.
Your Shopping List: Every Ingredient That Matters
Before preheating anything, gather these components. Precision matters more here than in wheat baking.
Table
| Ingredient | Amount | Why You Need It |
|---|---|---|
| Brown rice flour | 280g (2 cups) | Mild, nutty base providing backbone |
| Tapioca starch | 140g (1 cup) | Chewy texture and binding power |
| Potato starch | 70g (½ cup) | Moisture retention and softness |
| Psyllium husk powder | 2 tablespoons | Gel formation replacing gluten strands |
| Xanthan gum | 1 teaspoon | Additional elasticity and structure |
| Active dry yeast | 2¼ teaspoons | Leavening for that coveted rise |
| Warm water (110°F/43°C) | 360ml (1½ cups) | Yeast activation and flour hydration |
| Honey or maple syrup | 2 tablespoons | Yeast food and subtle sweetness |
| Olive oil | 3 tablespoons | Tender crumb and rich flavor |
| Apple cider vinegar | 1 teaspoon | Rise enhancement and aftertaste neutralization |
| Large eggs (room temperature) | 3 | Structure, richness, and lift |
| Salt | 1½ teaspoons | Flavor amplification |
Critical notes before you begin:
-
Psyllium husk is non-negotiable. Skip it, and you’ll produce another disappointing doorstop. This fiber supplement transforms into a gel when hydrated, creating the stretchy network your dough desperately needs.
-
Temperature control everything. Cold eggs straight from the refrigerator shock your yeast. Room temperature ingredients blend harmoniously. An instant-read thermometer eliminates guesswork.
-
Weigh, don’t scoop. Cup measurements vary wildly depending on how densely you pack flour. A digital kitchen scale costs less than three failed loaves and transforms your consistency.
-
Verify your yeast freshness. Expired yeast won’t activate, leaving you with a flat, heavy result. Test by proofing in warm water with a pinch of sugar—bubbling within ten minutes means you’re good to proceed.
Walking Through Each Step (No Experience Required)
Preparing Your Foundation
Start by waking up your yeast. Combine the warm water—precisely 110°F, no hotter—with your honey and yeast in a small bowl. Set it aside for five to ten minutes. You’re looking for a foamy, almost cappuccino-like surface. No foam means dead yeast. Start over. This single checkpoint prevents countless disappointments.
While waiting, whisk your dry ingredients together thoroughly. Brown rice flour, tapioca starch, potato starch, xanthan gum, psyllium husk, and salt need complete integration. Any pockets of xanthan gum or psyllium create gummy spots in your finished loaf.
Beat your eggs lightly, then blend in the olive oil and apple cider vinegar. The vinegar might seem odd, but it works magic—neutralizing any starchy aftertaste and helping your bread rise taller.
Mixing: Where Patience Pays Off
Here’s where gluten-free diverges dramatically from wheat traditions. Your dough won’t look like dough. It resembles thick cake batter or extremely soft cookie dough. Resist every instinct to add more flour. That wet, sticky consistency is exactly right.
A stand mixer with a paddle attachment makes this effortless—three to four minutes on medium speed incorporates air and fully hydrates the psyllium. No stand mixer? Grab your sturdiest wooden spoon and mix vigorously for four to five minutes. Your arm will feel the workout, but the results justify the effort.
The Waiting Game: Rising Properly
Transfer your batter to an oiled bowl. Cover tightly with plastic wrap. Find a warm spot—around 75 to 80°F works beautifully. A turned-off oven with the light on, a sunny countertop, or even atop your refrigerator where heat rises.
Wait forty-five minutes to an hour. Your dough should nearly double. This isn’t optional rushing. Gluten-free flours need time to fully hydrate and develop structure.
Shaping and Second Rise
Grease a standard 9×5-inch loaf pan and line with parchment paper. The parchment isn’t fussiness—it ensures clean release without sticking.
Scrape your dough in. Smooth the top with a wet spatula; water prevents sticking better than oil here. Cover again and let rise thirty to forty minutes. You’re waiting for the dough to crown slightly above the pan rim. Too little rise produces dense bread. Too much, and your loaf collapses in the oven.
Baking to Golden Perfection
Preheat your oven to 375°F (190°C). Slide your pan onto the center rack.
Bake forty-five to fifty-five minutes. Around the twenty-five-minute mark, check your crust color. If it’s browning too quickly, tent loosely with aluminum foil. This prevents burning while the interior finishes.
The only reliable doneness test: an instant-read thermometer pushed into the center. You’re targeting 205 to 210°F (96 to 99°C). Underbaked gluten-free bread turns gummy and dense as it cools. Overbaked, and you’ll have a dry, crumbly disappointment.
The Hardest Part: Actually Waiting to Slice
Remove from the oven. Let the loaf rest in its pan for exactly ten minutes—long enough to set the structure, short enough to prevent soggy bottoms. Then lift out using the parchment sling and transfer to a wire cooling rack.
Now wait. Two full hours. I understand the temptation. The smell fills your kitchen. The golden crust beckons. But cutting too early destroys the crumb structure your patience built. The steam inside needs time to redistribute and set properly.
Pro Secrets for Consistent Success
Master your temperatures. Water above 130°F kills yeast instantly. Water below 100°F leaves yeast sluggish. Invest in that thermometer.
Measure like a scientist. Volume measurements fail because humidity affects how much flour fits in a cup. Weight measurements remain consistent whether you’re baking in humid Florida or arid Arizona.
Store strategically:
Table
| Method | Duration | Best For |
|---|---|---|
| Bread box or paper bag at room temperature | 2–3 days | Immediate eating |
| Refrigerator (wrapped well) | 5–7 days | Slower consumption |
| Freezer, pre-sliced and wrapped | 2–3 months | Batch baking and meal prep |
Revive stale slices. Wrap in foil, bake at 350°F for ten minutes. Alternatively, a quick toast restores that satisfying crust crunch.
Troubleshooting Your Specific Problems
Table
| What Went Wrong | Why It Happened | Your Fix |
|---|---|---|
| Dense, gummy interior | Underbaked or excess liquid | Extend baking time; verify internal temperature reaches 205°F; reduce water by two tablespoons next attempt |
| Collapsed center | Over-proofed or oven running cool | Shorten second rise to thirty minutes; calibrate oven with external thermometer |
| Dry, crumbly texture | Overbaked or insufficient fat | Reduce baking time by five minutes; add one extra tablespoon oil |
| Large irregular holes | Excessive mixing or too much yeast | Mix only until ingredients disappear; verify yeast measurement |
| Soggy bottom crust | Insufficient cooling | Transfer to wire rack immediately after initial ten-minute rest |
Answering Your Most Pressing Questions
Can you prepare this without expensive equipment?
Absolutely. While a stand mixer streamlines mixing, determined stirring with a sturdy spoon achieves identical results. The key lies in vigorous, thorough mixing to fully activate the psyllium husk gel.
Why does store-bought gluten-free flour produce inconsistent outcomes?
Commercial blends vary enormously in composition. Some rely heavily on bean flours, introducing earthy, occasionally bitter flavors. Others lack sufficient binding agents. For this fluffy and soft gluten free bread recipe, blending your own flours guarantees control over texture and taste.
Is vegan adaptation possible?
Replace each egg with one tablespoon ground flaxseed mixed with three tablespoons water, rested five minutes. Substitute maple syrup for honey. Expect marginally denser results, though still pleasantly soft.
How do you achieve a crispy, crackly crust?
Bake inside a preheated Dutch oven for the initial twenty minutes, then remove the lid. Alternatively, brush the surface with olive oil before baking and skip the foil tenting step.
Your Next Move Starts Now
You’ve absorbed the framework. You understand why previous attempts disappointed and how this approach differs fundamentally. The ingredients await in your pantry—or they will after your next grocery run.
Consider this: millions of people worldwide navigate gluten-free living daily. Celiac disease affects roughly one percent of the global population. Non-celiac gluten sensitivity impacts an estimated six to ten percent more. Each person shares your desire for bread that doesn’t apologize for being gluten-free.
Your kitchen holds the power to produce something remarkable. Not merely edible bread, but genuinely delicious bread. Bread that toasts perfectly for your morning avocado. Bread that holds together in a sandwich without crumbling. Bread that fills your home with that irreplaceable aroma of baking.
So here’s your challenge. Gather these ingredients this week. Set aside an afternoon. Follow these steps precisely—especially the waiting periods your impatience usually overrides. Then pull that golden loaf from your oven and let it cool completely.
Slice into it. Spread butter that melts into the tender crumb. Take that first bite.
Then come back and tell me about it. Share your results, your tweaks, your triumphs. Did you add seeds? Experiment with herbs? Discover a storage trick I missed?
Your journey toward mastering a fluffy and soft gluten free bread recipe begins with a single loaf. But it continues through community, experimentation, and the shared joy of reclaiming something you thought was lost.
Ready to preheat that oven? Drop a comment below with your baking plans, bookmark this guide for your weekend project, and let’s transform your gluten-free baking from frustrating to fulfilling—one perfect slice at a time.